Step 1:
You can get virtually anywhere on a bus, so the first step in booking bus tickets is, of course, choosing your destination. Are you looking to visit a friend? Take a weekend trip out of state? Maybe just visit a new city in your current state? Pick your place of interest and move on to Step 2.
Step 2:
Once you’ve picked where you want to adventure off to, it’s time to start comparing prices. Most companies that offer scheduled service have a link on their homepage to buy destination bus tickets. Unfortunately, there is no “Expedia” or “Hotwire” for the bus world — but you can use bus aggregators to help you book tickets from multiple companies. For instance, Wanderu allows you to search tickets by selecting the origin and destination of choice. Greyhound and Megabus are a couple more examples of scheduled service operators that provide online ticketing systems.
Step 3:
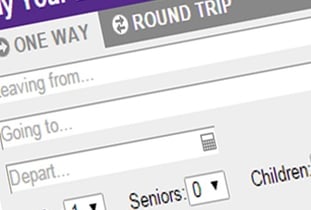
You have chosen your destination and found the lowest rate available. Now it’s time to actually book your trip. Once you locate the link for scheduled service, choose whether you want a one-way or a round-trip ticket. Keep in mind, scheduled service might also be referred to as “bus tickets,” “destination bus tickets,” or “regular route service” — it might even say something like “book your trip.” Type in your “from” and “to” destinations in the appropriate fields. If you book a one-way ticket, you’ll type in your desired departure date. With round trip tickets, you’ll choose a “leave on” and also a “return on” date. On this page you will also include how many tickets you plan to buy and the types of passengers in your group (e.g., adults, seniors, children, or members of the military).
Step 4:
After you have typed in your trip information, you will be prompted to select your trip. On this page, you might find different times available if there are a lot of buses departing and arriving — or, you may not have an option as to what time you depart.
Step 5:
Once you’ve selected the trip you want, it is time to type in your contact information. You will need to enter a first and last name for all passengers. Some companies require you to enter more fields — such as phone number and email address — at this step; others have you fill in that information when it comes time to pay, which is the next step.
Step 6:
It’s time to enter your payment information. On this page you will see a summary of your purchase, and you will be prompted to enter in your payment information. This includes a credit card number with expiration date and security code, as well as the cardholder’s name, billing address, phone number, and email address. Make sure to use an email address you frequently use — this is where the receipt for your purchase will be sent.
Step 7:
All bus companies will have terms and conditions specific to the trips they offer. You will need to check a box that indicates you agree with the terms and conditions, as well as any policies and rules spelled out on the page. Once this box, is checked, you can complete your purchase. As noted, confirmation of your ticket purchase will be sent to the email address on file.
Step 8:
Print your tickets! After you complete your purchase you will need to print the tickets (also referred to as boarding passes) for each leg of your trip.
Booking online bus tickets is as easy as it gets. Once you have a destination in mind, it’s as simple as filling out a few online forms and submitting payment. The last step — printing your tickets — is the most important. Many companies accept digital tickets; however there are still some that require you to have a physical boarding pass. Keep in mind that, unlike the airport, not every bus station will have a place for you to reprint your boarding passes . . . so make sure you have it with you at all times. When it comes time to board your bus, don’t forget your photo ID; it will be checked and verified by the driver for each leg of your trip. Book bus tickets for the entire group, sit back, and enjoy your trip!